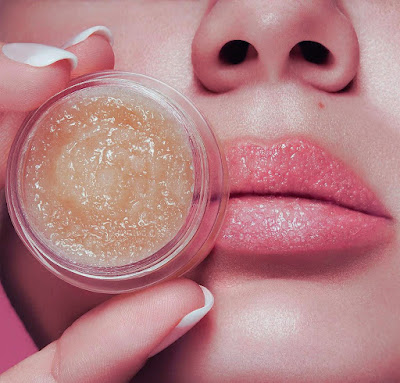
Lip Gloss Base introduction Lip gloss has been a beauty staple for generations, and its allure continues to captivate makeup enthusiasts around the world. There's something undeniably magical about the way lip gloss can transform your lips, adding a touch of luster and sophistication to your look. It's not just about achieving a glossy finish; it's about crafting your signature shine, one that reflects your style, personality, and creativity.
In this guide, we'll dive deep into the world of lip gloss base perfection. We'll unravel the secrets behind that coveted, perfect lip gloss shine and empower you to become the alchemist of your beauty routine. Whether you're a seasoned DIY beauty enthusiast or a curious beginner, this journey will equip you with the knowledge and skills to create lip gloss bases that are truly one-of-a-kind.
Are you ready to embark on this exciting cosmetic adventure? Let's explore the ingredients, techniques, and insider tips that will help you craft your very own signature lip gloss shine. Get ready to unlock the secrets and embrace the art of lip gloss base perfection. Understanding Lip Gloss Base Ingredients
Lip gloss, at its core, is a beautiful blend of carefully chosen ingredients that come together to create that coveted shine. To craft your signature gloss, it's essential to understand the fundamental components that make up a lip gloss base. These ingredients not only determine the gloss's texture and finish but also influence its staying power and overall quality.
**1. Oils: The Nourishing Foundation**
At the heart of any lip gloss base are oils. These oils serve as the primary base and provide the gloss with its smooth, moisturizing texture. Commonly used oils include jojoba oil, coconut oil, almond oil, and castor oil. Each oil has its unique properties, offering varying levels of hydration and shine. Experimenting with different oils can help you achieve the exact feel you desire for your lip gloss.
**2. Waxes: The Binding Agent**
Waxes are the secret to lip gloss's ability to stay put. Beeswax and candelilla wax are commonly used to thicken and stabilize the gloss, preventing it from becoming too runny. The right wax-to-oil ratio is crucial, as it influences the gloss's thickness and longevity.
**3. Emollients: Enhancing the Feel**
Emollients are ingredients that provide a soft, silky feel to your lip gloss. Cocoa butter, shea butter, and lanolin are excellent choices to consider. These ingredients not only contribute to the gloss's luxurious texture but also offer additional hydration to keep your lips soft and supple.
**4. Pigments and Mica: Adding Color and Sparkle**
Pigments and mica powders are responsible for giving your lip gloss its color and sparkle. The amount and type of pigment you use will determine whether your gloss has a sheer tint or intense color payoff. Mica powders, available in various shades and particle sizes, add shimmer and dimension to your gloss, creating a dazzling effect.
**5. Flavoring and Fragrance: A Personal Touch**
To make your lip gloss unique, you can add flavoring and fragrance oils. Peppermint, vanilla, or fruity scents can enhance the overall lip gloss experience. Just remember that some individuals prefer fragrance-free options, so it's always a good idea to provide options for your audience.
Understanding these key ingredients is the foundation of crafting your perfect lip gloss base. But the magic doesn't stop here; it's all about combining these elements in just the right way to achieve the desired texture, color, and finish. In the next sections, we'll explore how to choose the right ingredients and create your very own lip gloss base recipes to achieve the ultimate shine. Choosing the Right Ingredients
Now that we've laid the foundation by understanding the key ingredients in lip gloss bases, it's time to embark on the exciting journey of selecting the right components for your perfect shine. Your choice of ingredients will play a pivotal role in achieving the texture, color, and finish that align with your vision. Here's how to go about it:
**1. Oils: Customizing Hydration and Shine**
- Consider your desired level of shine and hydration. If you want a glossy but lightweight feel, opt for lighter oils like jojoba or apricot kernel oil. For a more substantial, moisturizing gloss, coconut or castor oil may be ideal.
- Experiment with oil blends to achieve a unique texture. Combining different oils allows you to fine-tune the gloss's consistency and feel.
**2. Waxes: Balancing Thickness and Longevity**
- Determine how thick you want your lip gloss to be. Beeswax provides a medium thickness, while candelilla wax offers a firmer hold. Finding the right balance is key.
- Adjust the wax-to-oil ratio to control the gloss's consistency. More wax results in a thicker gloss, while less wax creates a thinner, more lightweight formula.
**3. Emollients: Enhancing Luxuriousness**
- Choose emollients based on your desired texture. Shea butter and cocoa butter add richness and creaminess to your gloss, making it feel indulgent on the lips.
- Lanolin, renowned for its moisturizing properties, can be a great addition if you want an ultra-hydrating gloss.
**4. Pigments and Mica: Color and Sparkle Selection**
- Select pigments or mica powders that align with the color palette you envision for your lip gloss. Experiment with different shades and concentrations to achieve the perfect tint.
- Mix various mica powders to create dazzling multidimensional effects in your gloss. Combine subtle shimmer with bolder sparkle for a unique finish.
**5. Flavoring and Fragrance: Personalizing the Experience**
- Think about the sensory experience you want to create. Peppermint oil can give your gloss a refreshing tingle, while vanilla or fruity flavors can make it more enjoyable to wear.
- Fragrance oils can evoke various moods. Choose scents that resonate with your brand or personal style, but keep in mind that some individuals prefer unscented options.
Remember, the beauty of crafting your lip gloss lies in the freedom to experiment and tailor each ingredient to your liking. Start with small batches to test different combinations until you achieve the perfect balance that matches your signature shine. In the next section, we'll delve into the exciting realm of DIY lip gloss base recipes, where you can bring your vision to life. DIY Lip Gloss Base Recipes
With a solid understanding of lip gloss base ingredients and how to choose the right ones, it's time to roll up your sleeves and get creative. These DIY lip gloss base recipes will serve as your starting point, allowing you to experiment and craft your own signature shine. Let's dive into the art of lip gloss creation:
**1. Basic Hydrating Lip Gloss Base:**
*Ingredients:*
- 1 tablespoon coconut oil
- 1 teaspoon beeswax pellets
- 1/2 teaspoon shea butter
- Lip-safe flavoring or essential oil (optional)
- Lip-safe pigment or mica powder (optional)
*Instructions:*
1. In a microwave-safe bowl, combine coconut oil, beeswax, and shea butter.
2. Heat in short intervals, stirring between each, until fully melted and blended.
3. Add flavoring or essential oil for scent (if desired).
4. Optionally, add lip-safe pigment or mica powder for color and shimmer.
5. Pour the mixture into lip gloss containers and let it cool and solidify.
**2. Ultra-Glossy Lip Gloss Base:**
*Ingredients:*
- 2 tablespoons castor oil
- 1 tablespoon sweet almond oil
- 1/2 tablespoon beeswax pellets
- Lip-safe flavoring or essential oil (optional)
- Lip-safe pigment or mica powder (optional)
*Instructions:*
1. In a heatproof container, combine castor oil, sweet almond oil, and beeswax.
2. Heat in a double boiler until everything melts together.
3. Add flavoring or essential oil for a delightful scent (if desired).
4. Mix in lip-safe pigment or mica powder for your preferred color and sparkle.
5. Transfer the mixture into lip gloss tubes or pots and allow it to cool.
**3. Vegan-Friendly Lip Gloss Base:**
*Ingredients:*
- 2 tablespoons candelilla wax
- 1 tablespoon jojoba oil
- 1/2 tablespoon mango butter
- Lip-safe flavoring or essential oil (optional)
- Lip-safe pigment or mica powder (optional)
*Instructions:*
1. Combine candelilla wax, jojoba oil, and mango butter in a heatproof container.
2. Melt the ingredients using a double boiler.
3. Add flavoring or essential oil for a pleasant aroma (if desired).
4. Incorporate lip-safe pigment or mica powder for your chosen color and glimmer.
5. Pour the mixture into lip gloss containers and let it solidify.
These DIY lip gloss base recipes are customizable canvases for your creativity. You can modify them by adjusting ingredient quantities, trying different oils or waxes, and experimenting with unique flavorings, scents, or colors. As you gain confidence in your formulations, you'll be one step closer to crafting a lip gloss that truly reflects your signature shine. In the next section, we'll explore how to fine-tune your gloss for that perfect finish. Achieving Your Signature Shine
Creating the perfect lip gloss isn't just about mixing ingredients; it's about capturing your unique style and preferences in every application. Here's how you can fine-tune your lip gloss to achieve the signature shine that sets you apart:
**1. Texture Matters: Gloss or Glaze?**
- Experiment with the ratio of oils to waxes to achieve your desired texture. More oil results in a glossier finish, while more wax creates a thicker, glaze-like look.
- For a lighter, glass-like shine, opt for a higher oil content. If you prefer a more substantial, long-lasting gloss, increase the wax proportion.
**2. Playing with Pigments: Sheer or Bold?**
- Adjust the amount of lip-safe pigment or mica powder to control the color intensity. Less pigment yields a sheer tint, while more pigment provides bolder color payoff.
- Layering different shades can create stunning ombre effects or unique custom colors. Mix and match to find your perfect hue.
**3. Shimmer and Sparkle: Subtle or Dazzling?**
- The choice of mica powders impacts the level of sparkle in your gloss. Experiment with different particle sizes and concentrations to achieve the right shimmer.
- Combining fine and chunky mica powders can create a multidimensional, eye-catching finish that's uniquely yours.
**4. Scent Sensations: Personalize the Experience**
- Fine-tune the aroma of your lip gloss with lip-safe flavoring oils or essential oils. Whether you prefer fruity, minty, or vanilla notes, the scent should reflect your taste.
- Consider the emotional impact of the scent. A relaxing lavender scent or an invigorating citrus aroma can enhance the overall experience.
**5. Shine on Your Terms: Balancing Gloss and Stickiness**
- Finding the perfect balance between glossiness and stickiness is key. Adjust the wax-to-oil ratio to achieve your desired level of shine without compromising comfort.
- Keep in mind that a gloss with a slight tackiness may have better staying power, so consider the trade-off.
**6. Experiment and Explore: Be Your Own Gloss Chemist**
- Don't be afraid to experiment and take notes. Try small variations in your recipes, keeping track of what works best for you.
- Explore different application techniques. You can use a brush, your fingertip, or even a lip wand to achieve distinct looks.
Remember, your signature shine is a reflection of your personality and style. It might evolve over time as you gain experience and your preferences change. Embrace the journey of crafting your lip gloss and revel in the joy of creating something uniquely yours. In the next section, we'll address common issues that may arise during the DIY process and how to troubleshoot them, ensuring your lip gloss perfection continues to shine. Troubleshooting and Tips
As you venture into the world of crafting your signature lip gloss, you might encounter some common challenges. Fear not; many of these issues are easily solvable with a little know-how. Here are some troubleshooting tips to help you navigate potential hiccups and ensure your lip gloss creations turn out flawless:
**1. Gloss is too sticky:**
- **Solution:** Reduce the amount of beeswax in your recipe and increase the oil content. Be cautious not to overdo it, as an overly liquid gloss may be too runny.
**2. Gloss is too runny:**
- **Solution:** Add more wax to thicken the gloss. Start with small increments until you achieve the desired consistency. You can also cool and reheat the mixture to adjust.
**3. Separation of ingredients:**
- **Solution:** This can happen if your gloss cools too quickly. To avoid separation, stir the mixture continuously as it cools or use a warm water bath to keep it liquid while pouring into containers.
**4. Uneven color or shimmer distribution:**
- **Solution:** Make sure to mix the pigments or mica powders thoroughly into the base to ensure even distribution. Consider using a small spatula or toothpick for precise blending.
**5. Unpleasant odor or taste:**
- **Solution:** If you're not satisfied with the scent or taste of your lip gloss, experiment with different flavoring oils or essential oils. Start with a minimal amount and gradually increase until you achieve the desired aroma.
**6. Bubbles in the gloss:**
- **Solution:** To minimize bubbles, gently tap the lip gloss containers on a hard surface after pouring to release trapped air. You can also use a heat gun or hairdryer on low to remove surface bubbles.
**7. Gloss doesn't stay on long enough:**
- **Solution:** This issue can result from using too much oil and too little wax. Increase the wax content in your recipe to improve adhesion and longevity.
**8. Packaging and hygiene concerns:**
- **Solution:** Ensure that your lip gloss containers and tools are thoroughly cleaned and sanitized before use. Consider using disposable pipettes for transferring the gloss to containers to maintain cleanliness.
**9. Allergic reactions or sensitivities:**
- **Solution:** Always provide clear ingredient lists for your lip gloss creations, and recommend patch testing for individuals with sensitive skin or allergies. Offer alternatives for unscented or hypoallergenic versions.
By keeping these troubleshooting tips in mind and being open to experimentation, you'll become a lip gloss crafting expert in no time. Don't be discouraged by initial challenges; they are all part of the creative process. Your journey to lip gloss perfection will be a rewarding one, full of opportunities for innovation and self-expression. In the next section, we'll explore the art of packaging and presenting your lip gloss for maximum impact and appeal. Packaging and Presentation
Creating an enticing and visually appealing package for your homemade lip gloss is not only about preserving its quality but also about leaving a lasting impression on your users or customers. Here's how you can elevate your lip gloss presentation:
**1. Choosing the Right Containers:**
- Select containers that align with your brand or personal style. Options include clear lip gloss tubes, sleek glass vials, or small pots.
- Ensure that the chosen containers are clean and sanitized before filling them with your lip gloss to maintain product integrity.
**2. Labeling and Branding:**
- Design eye-catching labels that feature the name of your lip gloss, the ingredients, and any relevant product information.
- Incorporate your personal or brand logo for a professional touch.
- Consider using waterproof or oil-resistant labels to prevent smudging or fading over time.
**3. Hygiene and Safety:**
- Include a tamper-evident seal or shrink band around the lip gloss containers to assure users of product safety and freshness.
- Encourage users to perform a patch test before applying the lip gloss to ensure there are no adverse reactions.
**4. Creative Packaging Ideas:**
- Add a touch of luxury by placing your lip gloss containers in elegant gift boxes or pouches.
- Personalize packaging with ribbons, stickers, or charms that match your brand's aesthetic.
- Consider environmentally friendly packaging options, such as recyclable or biodegradable materials, to appeal to eco-conscious customers.
**5. Presentation is Everything:**
- Photograph your lip gloss in well-lit, appealing settings to showcase its color, texture, and sparkle.
- Share these high-quality images on social media, your website, or online marketplaces to attract potential customers.
**6. Safety and Compliance:**
- If you plan to sell your lip gloss, ensure that your packaging meets local and national cosmetic safety regulations.
- Clearly list all ingredients on the packaging to comply with labeling requirements.
**7. Informative Inserts:**
- Consider including an information insert with your lip gloss that provides usage tips, ingredient details, and contact information.
- This insert can enhance the user experience and build trust with your audience.
**8. Batch and Expiry Dates:**
- Label each lip gloss container with a batch number and an expiry date to track product freshness.
- This information is crucial for quality control and safety.
Effective packaging and presentation not only protect your lip gloss but also create a sense of anticipation and excitement for users. When your lip gloss looks and feels appealing, it enhances the overall experience, making it more likely that people will return for more or recommend your product to others. In the final section of this guide, we'll explore how to share your lip gloss creations with the world and potentially turn your passion into a thriving venture. Conclusion
Congratulations! You've embarked on a captivating journey through the world of lip gloss creation, discovering the secrets of lip gloss base perfection and learning how to craft your signature shine. From understanding essential ingredients to choosing the right components, experimenting with DIY lip gloss base recipes, and achieving your desired texture, color, and sparkle, you've gained the knowledge and skills to craft your perfect lip gloss.
Along the way, you've also become a troubleshooter, mastering the art of packaging and presentation, and discovering how to share your lip gloss creations with the world. Whether you're gifting your glosses to friends, starting a small business, or simply enjoying the creative process, your passion for lip gloss has taken you on a fulfilling and rewarding journey.
Remember that the beauty of creating lip gloss lies in your ability to experiment, innovate, and express your unique style. As you continue to fine-tune your formulations and develop your brand, stay open to new ideas and customer feedback. Your lip gloss creations have the potential to leave a lasting impression, whether it's the perfect finishing touch to your daily look or a sought-after product in the beauty industry.
So, embrace your inner lip gloss chemist, and let your creativity shine. Your journey to lip gloss perfection is an ongoing adventure, filled with endless possibilities and the promise of many more signature shines to come. Enjoy every moment, and may your lip gloss creations continue to dazzle and delight those who experience them.
Happy gloss-making!


Comments
Post a Comment